Sunday, April 25, 2010

RM1 Soft Drink @ IKEA

Don't know if anyone had noticed that the vending machine at IKEA customer service is only selling soft drinks at RM1. It must be subsidized by IKEA, they have PEPSI, PEPSI TWIST, MIRINDA, LIPTON LEMON TEA, etc...


Ought to check it out if you are around the area and thirsty for a sweet fix.

Sunday, April 18, 2010

Linksys/Cisco SD2008 8Port GB Switch, Poor Quality....

Had some free time today, decided to fix an issue that I had when I wired up my rooms with Giga network a few weeks ago.

I had a first generation Linksys/Cisco SD2008 8 port 10/100/1000M switch which was purchased a few years ago. It became faulty in 2008, I opened it up and discovered that some capacitors were blown. I replaced them and it worked fine. I used it a couple of times and cold storaged it after I received an ASUS GigaX 1108N from a friend(Yeah I like new things especially when they are white in color). Lately after wiring up my rooms with Giga network I found that I only had 1 port in my working room(I work from home and regularly used 2 PCs at a time). I didn't want to use WIFI because I always have video and audio calls thru the PC. So I re-animated my Linksys switch. Just to double check and also my itchy fingers I opened up the unit and here is what I found.


The freaking capacitors that I didn't change(it looked OK when I opened it the first time and changed the ones that were blown) were about to go too... look at the left 2 capacitors, they looked pregnant. The ones on the right were changed the last time.

So I had to take out my trusty old soldering iron and changed them to new ones. I had some spare capacitors at home(actually I have tons of them cataloged exactly like an electronics component shop... Yup I am a real sicko...), else I have to wait till I get back from Jakarta the week after. So here is the result...


I didn't realized that I still had it in me to desolder and resolder stuffs, have not been doing it for quite awhile now...:) So all changed... Just before I put everything back together I was skeptical on why the capacitors blew or was about to blow. Checked on the net a bit and it all pointed to the heat issue with the SD2008 first generation switches. I got creative and started to look for a used CPU fan... found a standard AMD one laying around, unused. Decided to retro fit it to the SD2008. Here goes...

Cut the fan ventilation hole first... and drilled the mounting holes.


Screwed up a bit, forgot to protect the surface and got the cover all scratched up. Ahhh.. what the heck it's going to be hidden anyway.

Fitted the fan....


Everything looks great until I switched it on... freaking loud... sounds more like a server to me... SHIT!!! I can't work with the noise, so i took out a 7809 voltage regulator IC and soldered it direct to the fan power cable. The 7809 regulated the 12Volt down to 9Volt, so the fan ran slower and quieter.

So here it is... running and fitted under my table.


There all done... all within 2 hours and while the kids are asleep...


Stay tune for more mods and projects coming up....


Building a Windows Home Server, Part 3 (Final part for hardware)

SATA SATA SATA... The card that I bought from Lowyat didn't work when I plugged it in. Seems that I needed to update the firmware before it could boot with a drive attached. DAMN!!!
Following the website's instructions brought me to a dead end, failed all 5 times when I tried to load the new firmware using their own reflash utility. Was looking around Windows Home Server and found that there was a flash utility for the card in the systems device properties page. Crossed my fingers and tried flashing the card again. WOLA!!!! it worked, booted and found the drive and Windows recognizes it... Looks like a RM39 SATA RAID CARD really works...


Now with the new card and 750GB HDD... I have in total... 2.1TB of usable space...


The project will stop here for the moment. I am almost 95% complete right now and the rest would be applications that I wanna put on the server.

So lets see what is next...

Friday, April 16, 2010

Building a Windows Home Server, Part 2

Welcome to part 2 of my Windows Home Server Build.

By now I already have my home server up and running but not really 100% up to my expectations. I was looking around ebay and thought that this would be a wonderful addition to the home server unit. So I ordered 2 pieces.


It came within 2 weeks and here it is fitted to my unit. Transfered the 1.5TB HDD to the first caddy and used a 160GB in the internal slot. So now total capacity is 1.6TB, will be fitting a SATA card into the PCI slot and put in another HDD. Up to now both internal and external GB ports gave the same transfer speeds. So no point in leaving the GB LAN card in there. I think I may have a couple of 750G HDDs somewhere... so officially by this weekend I will have a 2.3TB Home Server...

Remember I said something about looking for a shorter PSU in part 1? If the PSU length was a little longer I would have issues trying to fit both the HDD caddies. So lucky me, no issues here... Tight fit... but it works


Ouch VERY TIGHT FIT... Will be looking of a 'L' SATA cable the next time i am in Lowyat


More to come... part 3

Tuesday, April 13, 2010

Building a Windows Home Server, Part 1

I got a bit restless 2 weeks ago and decided to do a project. Since I have just wired up my 3 bedrooms with network points(2 rooms with GB ports and 1 with HOMEPLUG) I got itchy and wanted to run some applications on it. Surfing thru the net I found an article by ACER on their easyStore H340 SERVER(http://reviews.cnet.com/networking-and-wi-fi/acer-aspire-easystore-h340/4505-3243_7-33707300.html) and decided what the heck... lets give it a try since I have enough parts around the house to make one. So here goes....

1.) INTEL ATOM 330 D945GCLF-2


Got this from my previous project for my video conferencing demo systems. (I was using this ITX 'so called' PC to create packet loss and test packet lost performance during a video call)

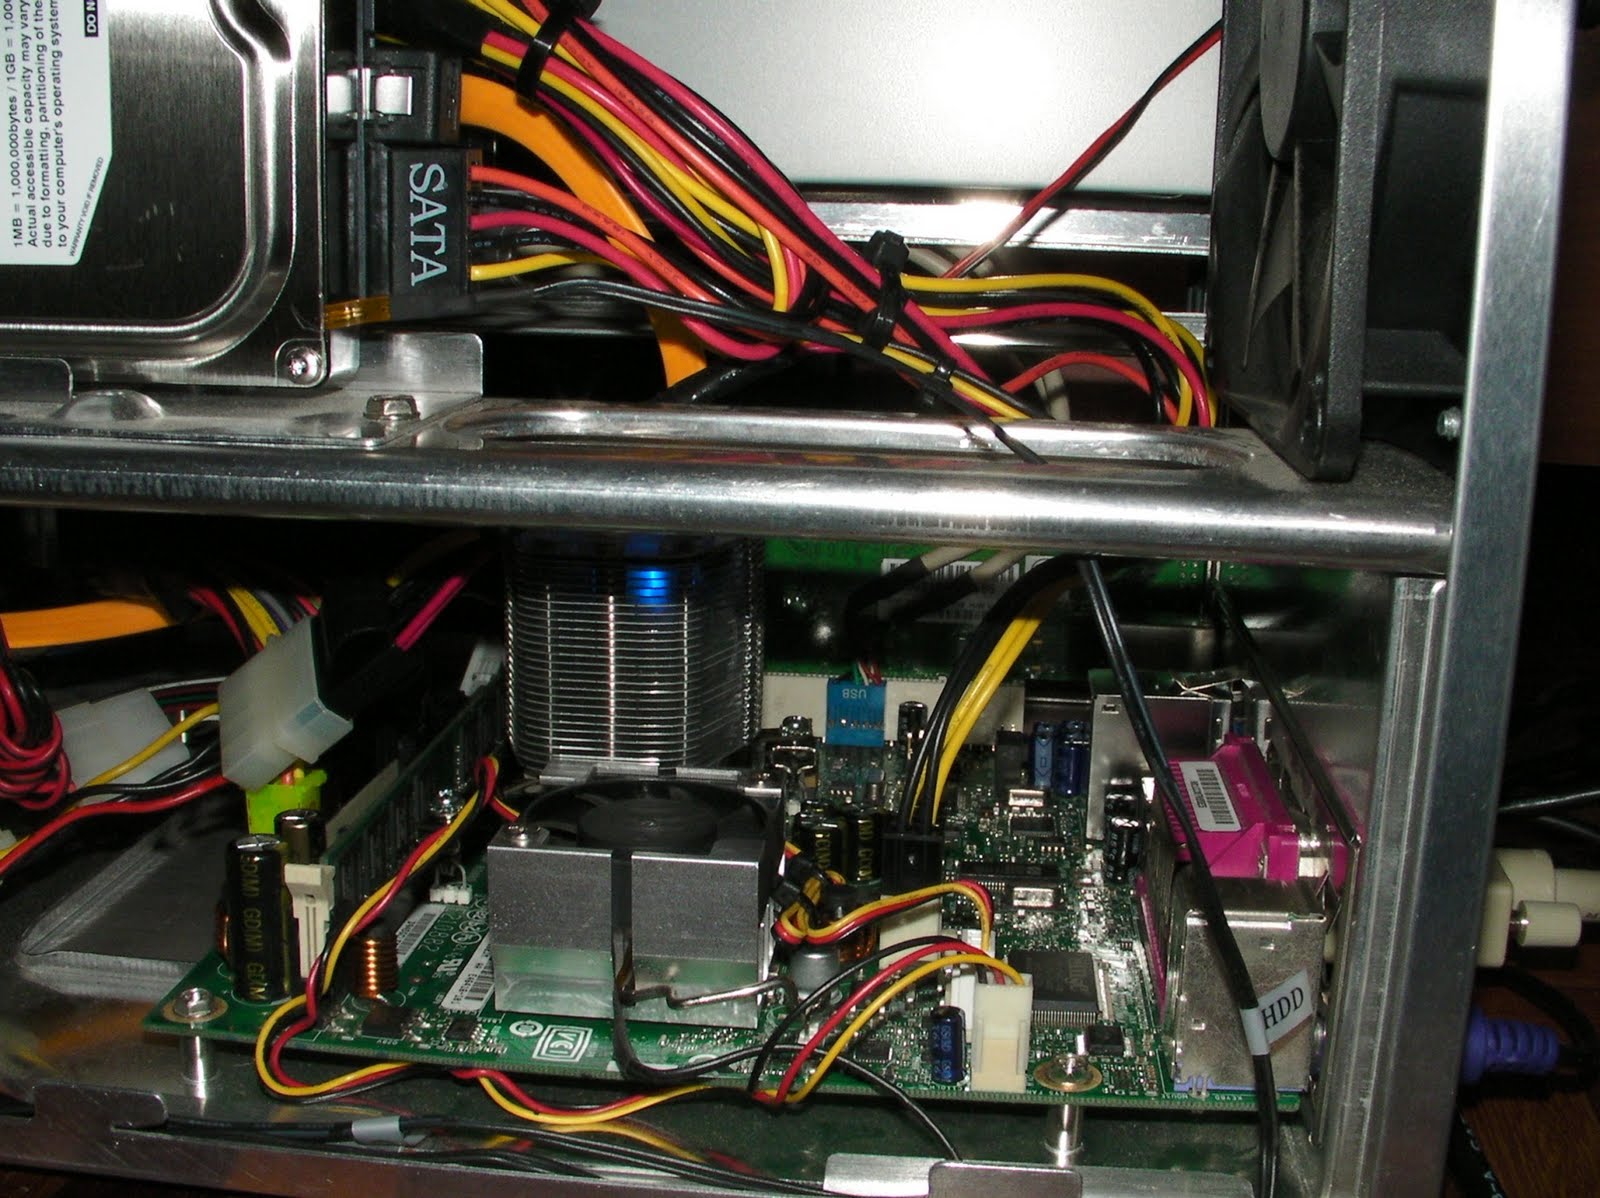
2.) Heatsink for the Intel 945 chipset, heat comes mainly from the chipset, NOT the processor.


Bought this CoolerMaster unit from Lowyat, think it was around RM40+. Removed the existing one from the ITX motherboard(on the left of the picture)

3.) Fitted it on.....


Looks huge on the small ITX motherboard. Had to bend the hinges to make it fit.

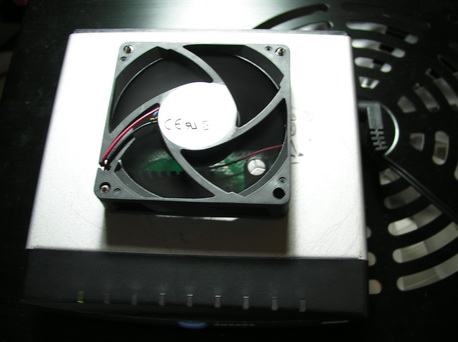
3.) I had an old HTPC casing with two 5.25' slots. Just wonderful to house the whole setup.


It was a pretty OK fit, case was meant for a micro-ATX board so i had some room. Take note that I have plugged in a GB PCI LAN card into the PCI slot. I was hearing reports that the onboard LAN port does not perform up to GB speeds. So I wanted to check. I used my old PowerLogic PSU, needed to recycle whatever I have. Only thing new was the HDD, 1.5TB samsung unit...:)

4.) Luck wasn't on my side, the freaking PowerLogic PSU fried itself after 2 reboots. Must be the age, looked at the warranty sticker and found out it was more then 4 years old. Shit.... So bought a new unit, needed something cheap and also shorter in length... why? Hahaha... read on in part 2.


Didn't realize that there was a blue light in the Coolermaster heatsink. Makes the whole setup look cool at nite...

5.) After booting up and setting up Windows Home Server i noticed that overall temperature of the system was high. Temp display was around 42 - 46 degrees, wasn't too happy. So i had to improvise.


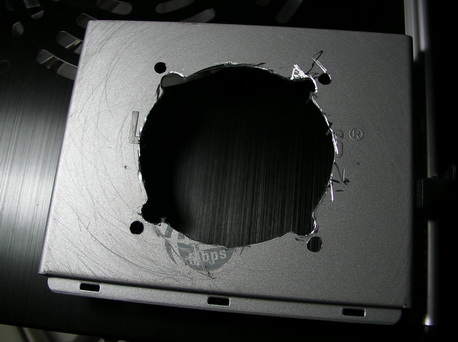
Both side panels of the HTPC casing was plastic so I took one side out and drilled some holes. Fitted it back on, temp dropped to 36 - 38 degrees. Looks like I solved the problem without any cost.

Think I am done? You must to be joking!!! Stay tuned for part 2 more to come...