Saturday, May 29, 2010

RONDO's outstation fuel consumption.... 9.2l/100km

Recently I took my family to Pangkor Island for a 4 day getaway. Needed the break after a long and tiring 1 and 1/2 quarter in 2010. I took the opportunity to test the RONDO's fuel consumption, the trip to Pangkor from Mutiara Damansara was roughly 240km with 130km on the north-south highway and the remaining 110km on smaller rural roads from Bidor to Lumut. Speed limit was kept at 110km/h on the highways and around 70 - 90km/h on the rural roads. There were some traffic on the rural roads but most of the time it was pretty clear. Only managed to overtake a handful of cars and lorries, so it should not affect the fuel consumption too much.

Upon reaching McDonalds just before Lumut Terminal(roughly 10 mins away) the RONDO's trip meter read :-


A pretty impressive 9.2l/100km. For a car that has a 2.0 liter engine and a weight of 1.6T without cargo, i think it is pretty impressive. So I could actually make a round trip without filling up(fuel tank is 55 liters).

Oh yeah, on the top right corner is my trusty Nokia 5800 with NOKIA MAPS(now free with latest firmware and also includes voice navigation). Pretty accurate but runs the battery dry really fast. I was on full charge before I left the house and by the time I reached Lumut ferry terminal it was almost dead with 1 bar left. Guess I should have charged it in the car all the way.

So that's it folks... hopefully by the next RONDO related post you will see it doing BELOW 9l/100km. I have a trip coming up in June to Malacca, hopefully by then the mods will be in.

Stay tuned....

Saturday, May 15, 2010

Car Computer.... in short carputer... Part 1

I have been toying around with the idea of fitting a car computer aka carputer in the RONDO for a long time. I was slowly buying parts and checking out individual items that would make this project feasible.

First I bought an ITX casing from lelong.com.my. This is one of the best place to search for good bargains and also check out prices before I head to the stores. I saw a Mini ITX Slim Casing - E-2011 and immediately bought it. Why? The casing comes with a 12V power supply and adapter, this would allow me to use this casing and its contents inside a car without modifications.


This is a picture of the 12V power supply board that comes with the casing.


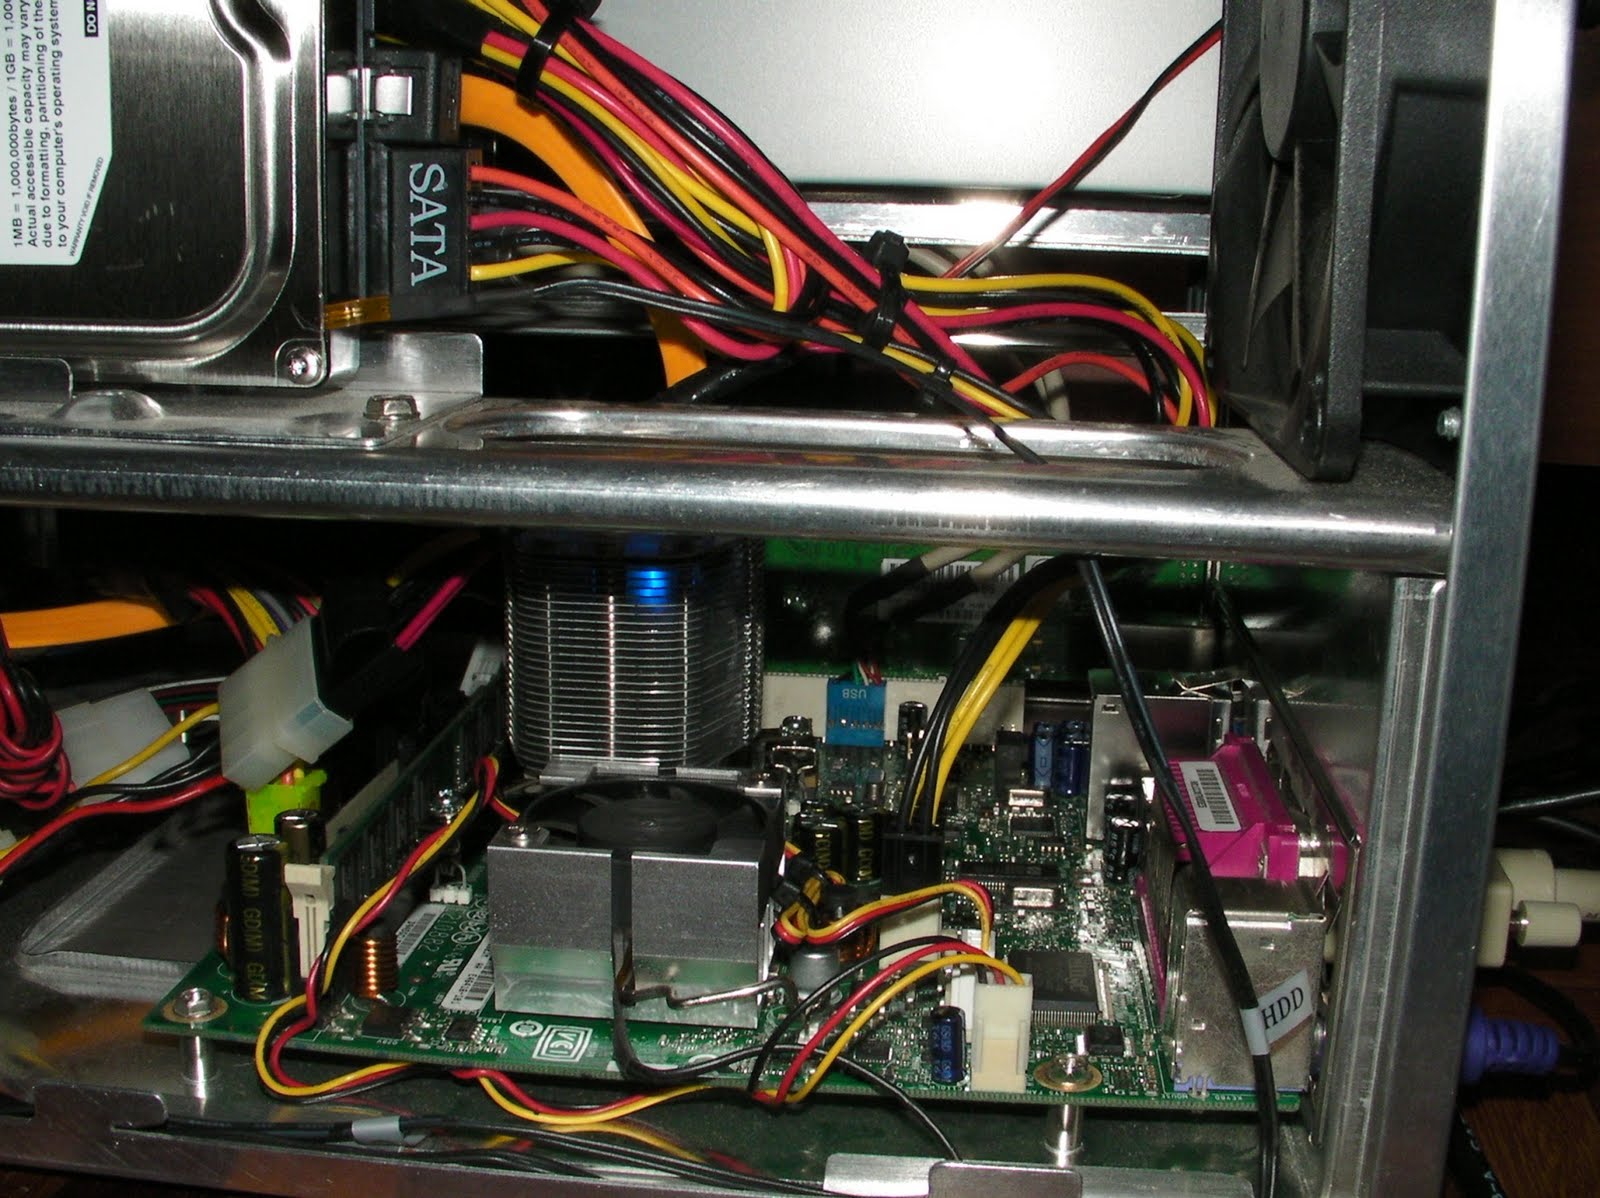
Next I fitted a ITX ATOM 330 board, this is the same model as the one that I used for my Windows Home Server Project. Looks good but the wires are everywhere... most of them too long, specially the SATA cable.


As you can see the ITX ATOM 330 board is fully equipped in terms of connectivity. Take note that this particular unit has a S-Video out too. Very useful for rear LCD monitors for my kids.


Front of the casing and the provided power adapter. Looks good...

I used to have a 64G SSD Kingston V drive for this project, but I installed it into my LENOVO S10-3T tablet netbook recently. So I have to get another one, might look for a V+ version now as it is much faster and swap with the netbook.

Next I have also order a 2 DIN RONDO mount to replace the current factory radio. It should arrive in a week's time. That will be part 2... so stay tuned.

Sunday, May 9, 2010

Earth/Ground Wire Custom Install on RONDO

Alright, as promised RONDO's Earth/Ground Wire Custom Install was done today within 3 hours. Just enough time during my kid's nap again.

First, I purchased some cables from the local hardware shop. You should ask for arc welding cables, last I checked it came with multiple sizes and prices too. Normally can be purchased based on per meter. I opted for the 400AMP cable which looks good and thick.


Made in Thailand and has an average of 16mm in diameter thickness(outer), inner core thickness is 8mm. Pretty heavy too...

Next you will need at least these tools to work on your wires.
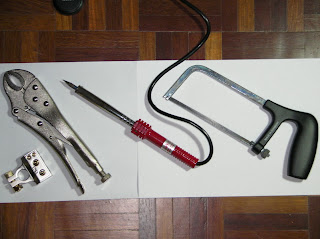


You will need to hacksaw to cut the wire, regular wire cutters don't work too well with the thickness and tough outer insulation. A high wattage soldering iron to solder the wire.(at least 60W and above) A clamp to make sure you hold the wire properly when you solder.

Here is a picture of a custom cable according to the needed length.


As you can see I only terminated one end to the gold plated brass terminal that I bought earlier last week. The other end is a soldered core to make sure the core does not come apart. This is important so that the core can sit into the negative terminal post and be tighten down with minimal flex.

Next we move on to the RONDO... have to dismantle lots of items battery, intake air hose, air filter and box assembly, ECU!!!!, Air flow sensor, etc....
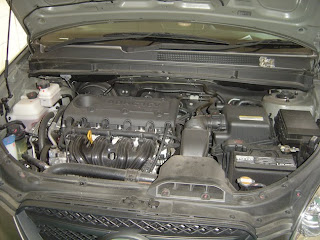


There the RONDO's engine bay...


Original NEGATIVE terminal bolted to the body...


Removed the battery.... you can still see the original battery terminal. I need to remove everything to get to the bolts holding the terminal down.


Removed the battery tray and the terminal mounting bolts. Bolts were tight and there were 2 bolts holding the terminal down. Sprayed some WD-40 and started looking around to see if there are any bolting points that I can use.


The original Terminal had a 2 bolt flange on it... so I decided to reuse and cut the flange out.


All done... need to reuse that flange to put the custom cable.

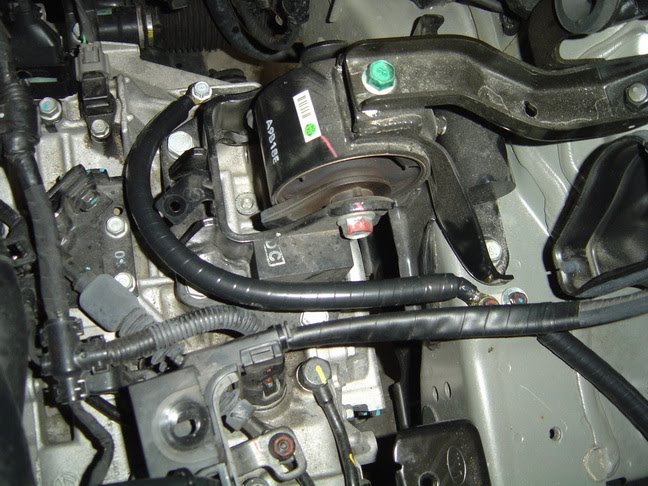
While I was looking around I found another grounding cable and it was grounding the chassis to the engine. If you don't already know, the engine is actually isolated from the chassis ground because it sits on 4 rubber engine mounts. Therefore it is vital that the engine also needs a good grounding system.


This cable is directly below the airfilter assemble so I have to dismantle the whole unit to get to it. This included the ECU, airfilter housing, airflow sensor and some vacuum tubes. Newer cars now have the ECU installed in the engine bay to save cost by reducing wiring. But I doubt the ECU would be reliable in the long run as it is very HOT in the engine bay. The RONDO has the ECU attached to the airfilter assembly and it is exposed to the incoming air. I believe this is a way to cool the unit.

Next we wire up with the new custom cables.


I decided to pull the engine grounding cable directly to the battery terminal. This should give it optimal grounding.


Now to put everything back and to install the new battery terminal...


Battery terminal fitted and installed... JOB DONE!!!!!! Now for the result :-

You wouldn't believe it, the dimming of the headlights when the air cond switches on has now been reduced, to the point that you really need to stare at the headlight reflection and be really still in order to catch it happening. Before this, it was visible even if you glance at the reflection on the wall at the right moment. I am really satisfied with this custom cable, it cost me only RM56 to build my own cable and make it look custom AND IT WORKS!!!!

I believe the problem is with the engine grounding cable, after a close inspection I found that this cable is not a single 'thick core' cable. Instead it was like 4 - 6 regular wires solder together and made to look nice with a thick insulation.

After poking around I will look into making 2 more cables... here are the locations


This is located on the left side of the engine bay, again it connects the engine to the chassis for ground. Same cable as the one that I replaced, touched it and it feels like 4 - 6 wires soldered together to give a thick cable look. DON'T BE FOOLED by the external looks...


This one is right next to the ECU and airfilter assembly. It looks like the termination point for the sensors and the ECU. I am planning to run another wire directly to this location. Because of the tight space I will not be using the ARC WELDING cables, instead I will look for some power amplifier cables from the local CAR AUDIO shops...

I am also thinking of making my own capacitor unit like this one below from RAIZIN for my next project but might max on the capacitors and see how many I can fit and put in a Voltage Monitor too if space permits...


So stay tuned for more folks....

Finally up and running after a long wait.....

Bros, looks like NA Garage is now finally up and running at 100% capacity after taking a 1 year break. Address and Location MAP below. As usual my partner AH SANG will run the show and I will show up on weekends to perform the wiring and tuning tasks.

Wednesday, May 5, 2010

My new babies...:) Dual 24s....
Got this done last weekend, didn't have the time to blog until now. My latest babies...:)


Dual 24inch displays, yes it looks like I am running a NOC in my room...:) Both units are currently running off my old 8800GT card(gift from my ex-boss a couple of years back)
As usual my table is messy as hell and also I had to modify my existing table by putting on an additional piece of wooden plank(lighter brown in color compared to my original table) to accomodate 2 LCDs, RM35 from ACE hardware...
Great upgrade...

Rondo.... Ohhhh.... Rondo.... Car Project Up Next!!!!!

I purchased a Naza Kia Rondo mid last year, I needed a 7 seater with enough space to ferry my 2 monkeys around and for road trips. Up till now the car has gone to Alor Star(family trip of 2 adults and 2 child), up to Genting and Camerons(full family) been to Port Dickson twice(for work! and leisure with family) and will be making a trip to lumut at the end of the month.

I have to say the Rondo is a pretty good and comfortable car and has enough power to pull the entire car weight with 2 adults and 2 kids and a 'so called trunk' full of stuffs. Been up to genting and camerons... no issues there.

If you are looking for a 7 seater just check it out. I definitely recommend this if your budget falls below RM90k.

http://www.nazakia.com.my/minivanssuvs/rondo/rondo-gallery-interior


Pretty darn good looking too if you ask me...:)

The only issue that I have with the car now is the dimming of headlights when the air cond starts up. It is very visible at night when you are stationary and parked in the porch. Somehow the drag of the air cond must be very high, thus causing a voltage dip in the car.

There seem to be only 2 options to fix the issue... change the new alternator which is bigger(I am not nuts, car is still under warranty so I ain't moving this route), rewiring the headlights directly to the battery(thinkable, easy to mod, but again warranty unless I can do a bloody good job and hide almost everything) and last increase the EARTH wire(easiest to do).

Being a lazy person I will start by doing the earth wire, I will customize my own as I like to be tidy as most of the shelf wiring kits are longer then necessary and makes the engine bay looks like a rat's nest. So I headed down to my favorite place in KL and bought these items.


Negative Battery terminal RM24
Ground terminals to suit 4 wires RM24
Then a bit of discount from the shop owner as he knows me... -RM3
So all in RM45

Next we will look for the cables... ain't gonna use amplifier or car audio cables(unless I really have too). Makes the whole thing looks cheap. You just have to hang on to the post to see what I will use...:)

Continue this weekend or maybe earlier...

Sunday, April 25, 2010

RM1 Soft Drink @ IKEA

Don't know if anyone had noticed that the vending machine at IKEA customer service is only selling soft drinks at RM1. It must be subsidized by IKEA, they have PEPSI, PEPSI TWIST, MIRINDA, LIPTON LEMON TEA, etc...


Ought to check it out if you are around the area and thirsty for a sweet fix.

Sunday, April 18, 2010

Linksys/Cisco SD2008 8Port GB Switch, Poor Quality....

Had some free time today, decided to fix an issue that I had when I wired up my rooms with Giga network a few weeks ago.

I had a first generation Linksys/Cisco SD2008 8 port 10/100/1000M switch which was purchased a few years ago. It became faulty in 2008, I opened it up and discovered that some capacitors were blown. I replaced them and it worked fine. I used it a couple of times and cold storaged it after I received an ASUS GigaX 1108N from a friend(Yeah I like new things especially when they are white in color). Lately after wiring up my rooms with Giga network I found that I only had 1 port in my working room(I work from home and regularly used 2 PCs at a time). I didn't want to use WIFI because I always have video and audio calls thru the PC. So I re-animated my Linksys switch. Just to double check and also my itchy fingers I opened up the unit and here is what I found.


The freaking capacitors that I didn't change(it looked OK when I opened it the first time and changed the ones that were blown) were about to go too... look at the left 2 capacitors, they looked pregnant. The ones on the right were changed the last time.

So I had to take out my trusty old soldering iron and changed them to new ones. I had some spare capacitors at home(actually I have tons of them cataloged exactly like an electronics component shop... Yup I am a real sicko...), else I have to wait till I get back from Jakarta the week after. So here is the result...


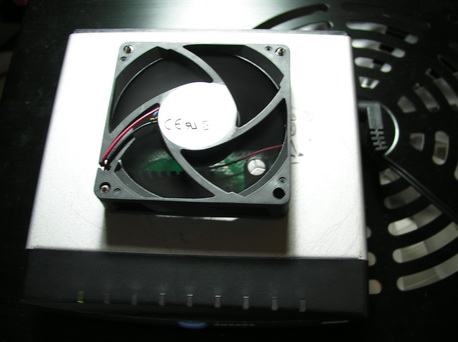
I didn't realized that I still had it in me to desolder and resolder stuffs, have not been doing it for quite awhile now...:) So all changed... Just before I put everything back together I was skeptical on why the capacitors blew or was about to blow. Checked on the net a bit and it all pointed to the heat issue with the SD2008 first generation switches. I got creative and started to look for a used CPU fan... found a standard AMD one laying around, unused. Decided to retro fit it to the SD2008. Here goes...

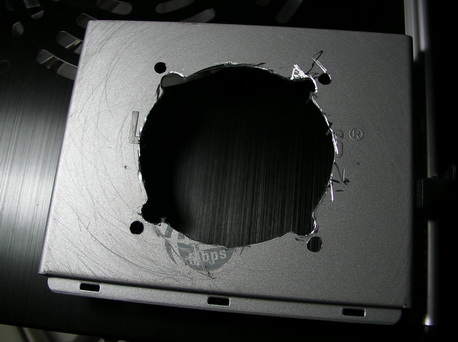
Cut the fan ventilation hole first... and drilled the mounting holes.


Screwed up a bit, forgot to protect the surface and got the cover all scratched up. Ahhh.. what the heck it's going to be hidden anyway.

Fitted the fan....


Everything looks great until I switched it on... freaking loud... sounds more like a server to me... SHIT!!! I can't work with the noise, so i took out a 7809 voltage regulator IC and soldered it direct to the fan power cable. The 7809 regulated the 12Volt down to 9Volt, so the fan ran slower and quieter.

So here it is... running and fitted under my table.


There all done... all within 2 hours and while the kids are asleep...


Stay tune for more mods and projects coming up....


Building a Windows Home Server, Part 3 (Final part for hardware)

SATA SATA SATA... The card that I bought from Lowyat didn't work when I plugged it in. Seems that I needed to update the firmware before it could boot with a drive attached. DAMN!!!
Following the website's instructions brought me to a dead end, failed all 5 times when I tried to load the new firmware using their own reflash utility. Was looking around Windows Home Server and found that there was a flash utility for the card in the systems device properties page. Crossed my fingers and tried flashing the card again. WOLA!!!! it worked, booted and found the drive and Windows recognizes it... Looks like a RM39 SATA RAID CARD really works...


Now with the new card and 750GB HDD... I have in total... 2.1TB of usable space...


The project will stop here for the moment. I am almost 95% complete right now and the rest would be applications that I wanna put on the server.

So lets see what is next...

Friday, April 16, 2010

Building a Windows Home Server, Part 2

Welcome to part 2 of my Windows Home Server Build.

By now I already have my home server up and running but not really 100% up to my expectations. I was looking around ebay and thought that this would be a wonderful addition to the home server unit. So I ordered 2 pieces.


It came within 2 weeks and here it is fitted to my unit. Transfered the 1.5TB HDD to the first caddy and used a 160GB in the internal slot. So now total capacity is 1.6TB, will be fitting a SATA card into the PCI slot and put in another HDD. Up to now both internal and external GB ports gave the same transfer speeds. So no point in leaving the GB LAN card in there. I think I may have a couple of 750G HDDs somewhere... so officially by this weekend I will have a 2.3TB Home Server...

Remember I said something about looking for a shorter PSU in part 1? If the PSU length was a little longer I would have issues trying to fit both the HDD caddies. So lucky me, no issues here... Tight fit... but it works


Ouch VERY TIGHT FIT... Will be looking of a 'L' SATA cable the next time i am in Lowyat


More to come... part 3

Tuesday, April 13, 2010

Building a Windows Home Server, Part 1

I got a bit restless 2 weeks ago and decided to do a project. Since I have just wired up my 3 bedrooms with network points(2 rooms with GB ports and 1 with HOMEPLUG) I got itchy and wanted to run some applications on it. Surfing thru the net I found an article by ACER on their easyStore H340 SERVER(http://reviews.cnet.com/networking-and-wi-fi/acer-aspire-easystore-h340/4505-3243_7-33707300.html) and decided what the heck... lets give it a try since I have enough parts around the house to make one. So here goes....

1.) INTEL ATOM 330 D945GCLF-2


Got this from my previous project for my video conferencing demo systems. (I was using this ITX 'so called' PC to create packet loss and test packet lost performance during a video call)

2.) Heatsink for the Intel 945 chipset, heat comes mainly from the chipset, NOT the processor.


Bought this CoolerMaster unit from Lowyat, think it was around RM40+. Removed the existing one from the ITX motherboard(on the left of the picture)

3.) Fitted it on.....


Looks huge on the small ITX motherboard. Had to bend the hinges to make it fit.

3.) I had an old HTPC casing with two 5.25' slots. Just wonderful to house the whole setup.


It was a pretty OK fit, case was meant for a micro-ATX board so i had some room. Take note that I have plugged in a GB PCI LAN card into the PCI slot. I was hearing reports that the onboard LAN port does not perform up to GB speeds. So I wanted to check. I used my old PowerLogic PSU, needed to recycle whatever I have. Only thing new was the HDD, 1.5TB samsung unit...:)

4.) Luck wasn't on my side, the freaking PowerLogic PSU fried itself after 2 reboots. Must be the age, looked at the warranty sticker and found out it was more then 4 years old. Shit.... So bought a new unit, needed something cheap and also shorter in length... why? Hahaha... read on in part 2.


Didn't realize that there was a blue light in the Coolermaster heatsink. Makes the whole setup look cool at nite...

5.) After booting up and setting up Windows Home Server i noticed that overall temperature of the system was high. Temp display was around 42 - 46 degrees, wasn't too happy. So i had to improvise.


Both side panels of the HTPC casing was plastic so I took one side out and drilled some holes. Fitted it back on, temp dropped to 36 - 38 degrees. Looks like I solved the problem without any cost.

Think I am done? You must to be joking!!! Stay tuned for part 2 more to come...